If you notice that your washing machine is not draining properly, or if the machine (and your clothes) smell unpleasant even after washing, the culprit is likely a clogged or dirty filter. This guide covers the best method to clean your filter, eliminate odors, and ensure your machine runs smoothly.
1. Locate Your Filter
The first step is finding the filter on your specific machine.
- Front-load machines: Look for a small door on the front or side of the unit. This door usually pops open easily to reveal the filter mechanism.
- Top-load machines: Not every top-loader has a user-accessible filter. If yours does, it is often located in the center of the agitator (remove the top cap to access).
Tip: If the filter is hidden or difficult to find, perform a quick online search using your washer’s make and model to find a schematic or specific instructions.
2. Prepare the Area
Before opening the filter door, preparation is key to avoiding a mess.
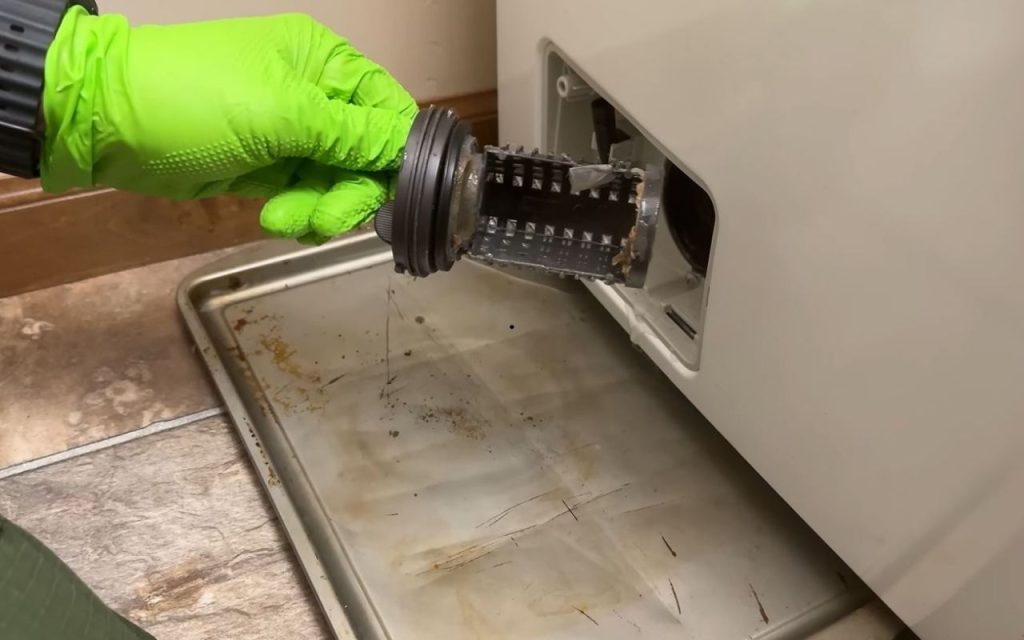
- Use a baking sheet: Slide a baking sheet underneath the filter door. It fits easily under most machines and is perfect for catching the water that will inevitably drain out.
- Be ready for odors: If the filter has been neglected, be braced for some strong, funky odors when you open it.
3. Drain and Remove the Filter
Most machines have a small emergency drain hose next to the main filter.
- Release excess water: If available, use the small hose to drain the majority of the water onto your baking sheet or into a shallow container.
- Remove the filter: Twist the main filter counter-clockwise. Pull it out slowly. Remaining water will flow out onto the baking sheet.
4. Deep Clean the Filter
Once removed, the filter will likely be covered in gunk and grime. Follow these steps to restore it:
Remove Surface Debris
Before applying cleaners, use a damp paper towel to wipe away the initial layer of grime. This prevents heavy debris from going down your sink drain.
Apply DIY Cleaning Solution
Use a simple, effective homemade mixture to degrease and deodorize:
- 1 cup White Vinegar (deodorizes)
- 1 cup Water
- 1 teaspoon Blue Dawn Dish Soap (degreases)
Mix these in a spray bottle and spray down the filter. Let it sit for 5 to 10 minutes to break down buildup and neutralize odors.
Scrub and Rinse
After soaking, use a toothbrush to scrub the filter thoroughly. Once scrubbed, rinse it under the sink until it is completely clean.
5. Clean the Housing and Drain Hose
Do not neglect the compartment where the filter sits.
- Clean the housing: Spray the DIY vinegar mix inside the filter housing (receptacle) and scrub it with your toothbrush to remove internal grime.
- Unclog the drain hose: If the small drain hose didn’t release water easily earlier, it may be clogged. Insert a pipe cleaner into the hose and scrub gently to dislodge any grime. This ensures easier maintenance in the future.
6. Reassembly and Leak Test
This is the most critical step. Improper reassembly can lead to flooding.
- Secure the drain hose: Replace the plug on the small drain hose effectively and ensure it is tight. Tuck the hose back into place.
- Insert the filter: distinctively thread the filter back into the housing. Turn it clockwise until it is tight and snug.
- Test for leaks: Before walking away, run a quick cycle to get water into the machine. Watch the bottom area closely. If you see any water, stop the machine immediately and retighten the filter.
Conclusion
By following these steps, you can eliminate drainage issues and nasty smells from your laundry room. Regular maintenance of your washer’s filter ensures your clothes come out fresh and prevents potential water damage from leaks.