Cleaning the oven is often considered one of the most daunting household chores. Grease and burnt-on food accumulate over time, affecting the appliance’s performance and hygiene. However, by following a systematic approach used by cleaning professionals, you can restore your oven’s shine with less effort.
Supplies Needed
Before you begin, gather the following tools and materials. You can choose between a natural cleaning route or a heavy-duty commercial option.
- For Rack Soaking:
- Bathtub or large plastic bin
- Dishwasher pods (containing enzymes)
- Cleaning Tools:
- Vacuum cleaner with hose attachment (or a hand brush)
- Plastic putty knife
- Microfiber towels
- Razor blade scraper (with fresh blades)
- Non-scratch scouring sponge (avoid abrasive green/yellow scrubbers)
- Ultra-fine steel wool (Grade #0000)
- Paper towels
- Cleaner Options:
- Option A (Natural): Baking soda, water, and white vinegar.
- Option B (Commercial): Heavy-duty oven and grill cleaner.
- Safety Gear:
- Gloves
- Safety glasses (if using chemical sprays)
Step-by-Step Cleaning Instructions
1. Remove and Soak the Racks
Begin by taking the racks out of the oven. Racks are often difficult to clean due to their numerous edges and heavy grease buildup. Place them in a bathtub or a large plastic bin filled with warm water. Add a dishwasher pod to the water; the enzymes designed to break down food on dishes effectively break down grease on oven grates. Allow them to soak while you clean the rest of the oven.
2. Remove Dry Debris
Before applying any liquid cleaners, remove loose crumbs, burnt food, or charcoal from the bottom of the oven. Removing this debris first allows the cleaner to work directly on the baked-on grease.
- Use a vacuum cleaner, a brush, or pick up larger pieces with a paper towel.
- For stuck-on chunks, gently scrape them loose with a plastic putty knife before vacuuming them up.
3. Apply Your Chosen Cleaner
Select the cleaning agent that best fits your needs.
- The Natural Method: Create a paste using baking soda and a small amount of water. Scrub this paste onto the surfaces to break surface tension and loosen grease. Note: Do not mix baking soda and vinegar in a bowl simultaneously, as this creates salt water which is ineffective for cleaning. You will use the vinegar later to rinse.
- The Commercial Method: If using a store-bought oven cleaner, ensure you are in a well-ventilated area (open windows or use fans) and wear PPE like gloves and glasses.
- Protect Surfaces: If your oven has a stainless steel exterior or trim, cover it with towels. Strong cleaners can etch stainless steel if they drip onto it.
- Application: Spray the cleaner evenly across the interior. Gently lift the bottom heating element to spray underneath it, as this area collects significant grime. If cleaner gets on the element, simply wipe it off with a damp towel.
4. Let the Cleaner Dwell
Patience is key. While many bottle instructions suggest 10 minutes, professionals recommend letting the cleaner sit for 30 minutes to an hour. This dwell time allows the product to fully emulsify the grease, making it much easier to wipe away later.
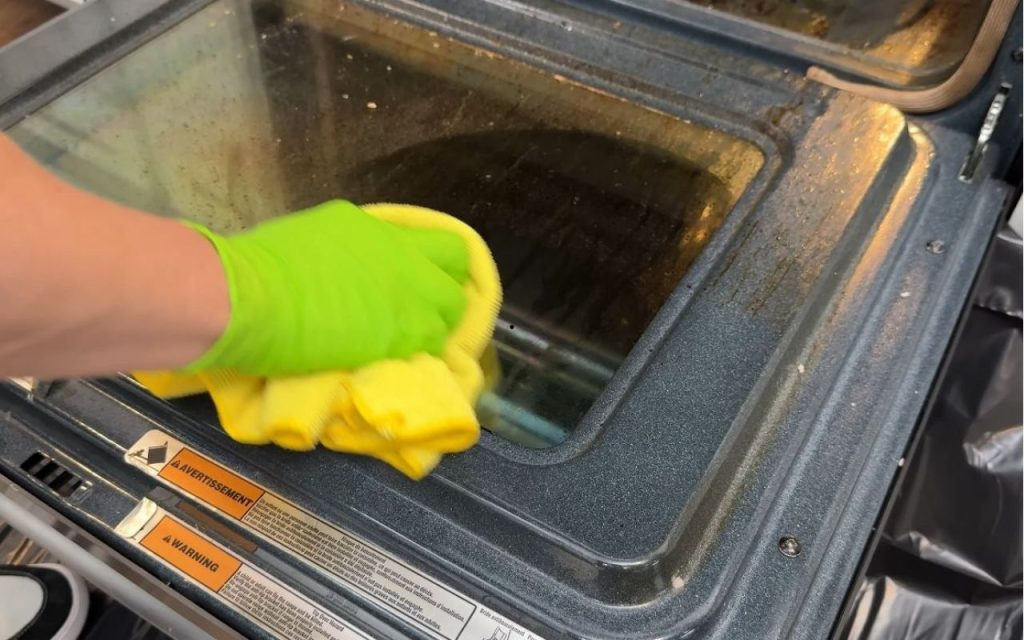
5. Wipe and Scrub the Interior
Once the cleaner has done its work, use a damp microfiber towel to wipe down the interior. Rinse your towel frequently to keep it effective.
- For Stubborn Burnt-On Spots: If wiping doesn’t remove hardened char, use a razor blade scraper.
- Caution: Always lubricate the surface with cleaner first to prevent scratching.
- Use a new, rust-free blade and scrape slowly at a low angle.
- For Texture: Use a non-scratch scouring sponge to scrub the textured interior walls.
- Warning: Never use aggressive green and yellow kitchen scrubbers; they can scratch the oven coating, leading to rust over time.
6. Clean the Ceiling
The top of the oven can be tricky because the upper heating coil is usually fixed and does not move. Simply scrub, wipe, and rinse this area as best as you can, working around the element.
7. Finish the Racks
Return to the racks soaking in the tub. The enzymes from the dishwasher pod should have loosened the grime.
- Scrub the racks with your scouring sponge.
- For extremely tough grease, use ultra-fine (#0000) steel wool to cut through the remaining residue.
- Rinse the racks thoroughly and dry them before placing them back in the oven.
8. Final Rinse
Perform a final wipe-down of the oven interior with a damp towel to ensure no chemical residue or cleaning paste remains. Follow up with a dry microfiber cloth for a streak-free finish.
Important Tips and Warnings
- Avoid the Self-Clean Function: Professional repair technicians generally advise against using the “Self-Clean” mode found on many ovens. The cycle heats the oven to nearly 800°F, which is a fire hazard and can melt internal fuses, control panels, and electronic components.
- Removing the Door: While some oven doors can be removed via latches to make access easier, proceed with caution. The doors are heavy, and incorrect handling can cause the glass to shatter. Always check the manufacturer’s instructions and consider having a second person assist you.
- Razor Safety: When using a razor scraper, ensure the blade is not rusty, as this can gouge the enamel.