Gas cooktops are a centerpiece in many kitchens, but their intricate design makes them a magnet for grease and grime. Residue often accumulates in hidden cracks and crevices, which can lead to unpleasant odors and a lackluster appearance. While the various components may seem intimidating to disassemble, a systematic approach ensures a safe and thorough clean.
Follow this step-by-step guide to restore your cooktop to its original shine.
Supplies Needed
Before beginning, gather the necessary tools and cleaning agents.
- Camera or Smartphone: To document the layout.
- Plastic Tote or Bin: Useful if your sink is small.
- Cleaning Agents:
- Mild dish soap (for light to medium soil).
- Heavy-duty degreaser (for heavy grease build-up).
- Ammonia (optional, for extreme grime).
- Cooking oil (such as avocado or olive oil).
- Tools:
- Vacuum cleaner with a soft bristle brush attachment.
- Non-scratch scrub sponges.
- Detail cleaning brush or toothbrush.
- Razor blade scraper.
- Microfiber towels.
- Steel scouring pad (for cast iron components only).
- Paper towels.
- Heavy-duty garbage bag.
Step-by-Step Instructions
1. Preparation and Disassembly
Before removing any parts, take a clear photograph of your cooktop. Gas stoves have many components, and a reference photo ensures you can reassemble them correctly later. Remove the grates, burner caps, and burner heads to expose the base surface.
2. Soak the Components
Fill a sink or a plastic tote with warm water. Add your chosen cleaning agent based on the level of soil:
- Light to Medium Grime: Use standard dish soap.
- Heavy Grime: Opt for a professional heavy-duty degreaser. Place the removed components into the solution and let them soak while you clean the stove surface.
3. Clear Loose Debris
Use a vacuum cleaner equipped with a soft bristle brush attachment to remove loose crumbs and large debris from the cooktop surface. This prevents you from pushing dirt around during the wet cleaning stage.
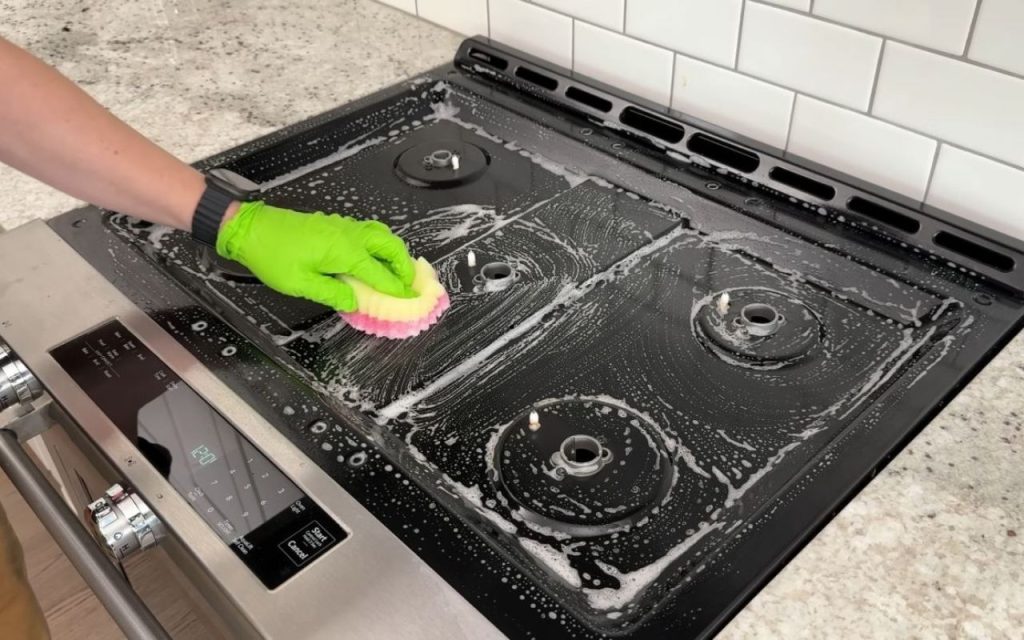
4. Clean the Cooktop Surface
Spray a degreaser or cleaning solution evenly across the cooktop. Use a warm, damp non-scratch sponge to scrub the surface.
- Safety Note: Avoid spraying cleaner or scrubbing directly into the gas holes where the gas is emitted.
- Detail Work: Use a toothbrush to scrub around the starter and other tight openings where grease collects.
5. Remove Burnt-on Residue
If the surface has stubborn, burnt-on food that a sponge cannot remove, use a razor blade scraper.
- Lubrication is Key: Always ensure the surface is wet with cleaner before scraping; never scrape a dry surface.
- Check the Blade: Use a fresh blade. Rusty blades can scratch the enamel or stainless steel.
6. Rinse and Buff
Once the grime is lifted, thoroughly rinse the surface to remove all soap residue. Leftover soap can dry into a sticky film that attracts more dirt and causes streaking. Finish by buffing the entire surface with a dry, clean microfiber towel to eliminate streaks and moisture.
7. Scrub the Soaked Components
Return to the parts you set aside to soak. Most grease should now be loose.
- General Scrubbing: Use a non-scratch sponge or brush to clean the components.
- Stubborn Cast Iron: For burnt-on grease on cast iron grates, you may use a steel scouring pad. Use caution, as these can scratch delicate surfaces.
- Burner Heads: Use a toothbrush to clean the nooks and crannies of the burner heads.
8. The Ammonia Method (For Extreme Grime)
If your grates are heavily soiled and scrubbing is ineffective, use ammonia vapor:
- Place the grates inside a heavy-duty garbage bag.
- Add approximately 1/3 cup of ammonia to the bag.
- Seal the bag (placing it in a bin prevents leaks) and let it sit for 2 to 3 hours, or preferably overnight.
- The fumes will loosen the grime, making it easy to scrub off afterward.
9. Dry and Season Cast Iron
After rinsing the components, it is critical to dry all cast iron parts thoroughly to prevent rust. To condition the cast iron and further protect it:
- Apply a small amount of oil (like olive or avocado oil) to a paper towel.
- Rub a thin layer over the cast iron components. This enhances their appearance and prevents corrosion.
10. Reassemble
Using the photo you took in step one as a guide, place the burner heads, caps, and grates back into their correct positions.
Additional Tips for Maintenance
- Daily Maintenance: Wipe down the cooktop with a damp microfiber towel after every use to prevent buildup.
- Spill Management: Clean up spills and splatters immediately before they have a chance to harden and bond to the surface.
- Deep Cleaning Frequency: While daily wiping is essential, a full deep clean (disassembling and soaking parts) is generally recommended about twice a year to keep the appliance in top condition.