If your kitchen cabinets feel sticky to the touch, appear greasy, or simply look a bit dull, they require a thorough cleaning to restore their finish. While wiping down counters is a daily habit, cabinets often collect layers of dust and cooking residue that can be difficult to remove if approached incorrectly. This guide outlines a professional method to clean your cabinetry effectively without damaging the surface.
Supplies Needed
Before beginning, gather the following tools and ingredients. Using a bucket rather than a spray bottle is recommended to prevent drip marks, which can run down painted surfaces and leave permanent streaks.
- Duster or Vacuum: A hand duster or a vacuum cleaner with a hose.
- Bucket: For mixing your cleaning solution.
- Cleaning Agents:
- For Painted/Laminated Cabinets: Dish soap and warm water.
- For Natural Wood Cabinets: Oil soap (use sparingly) and warm water.
- Microfiber Towels: You will need at least three separate towels for the washing system.
- Soft Bristle Brush: A toothbrush works well for tight crevices.
- Non-Scratch Scrub Sponge: Ensure it is soft to avoid damaging the finish.
- Melamine Sponge: For stubborn marks.
- Plastic Bin: Helpful for organizing drawer contents during the process.
Step-by-Step Instructions
1. Remove Surface Dust and Debris
Always begin by dusting or vacuuming the cabinets before applying any moisture. If you apply a wet cloth to a dusty cabinet, the water will mix with the dust to create a sticky “mud” that is difficult to wipe away.
- Dusting: If using a disposable duster, fluff it with your hands first to maximize dust pickup.
- Vacuuming: If using a vacuum, always attach a soft bristle brush to prevent scratching the cabinet surface.
- Technique: Start from the top and work your way down to the floor. Pay special attention to ledges and trim, where dust tends to settle.
2. Prepare Your Cleaning Solution
Select the appropriate cleaning agent for your cabinet finish.
- Painted or Laminated: Mix a few drops of grease-cutting dish soap with warm water in your bucket.
- Natural Wood: Use a capful of oil soap mixed with warm water. Note: Be careful not to use too much oil soap, as an excess can leave a sticky, tacky residue that attracts more dirt.
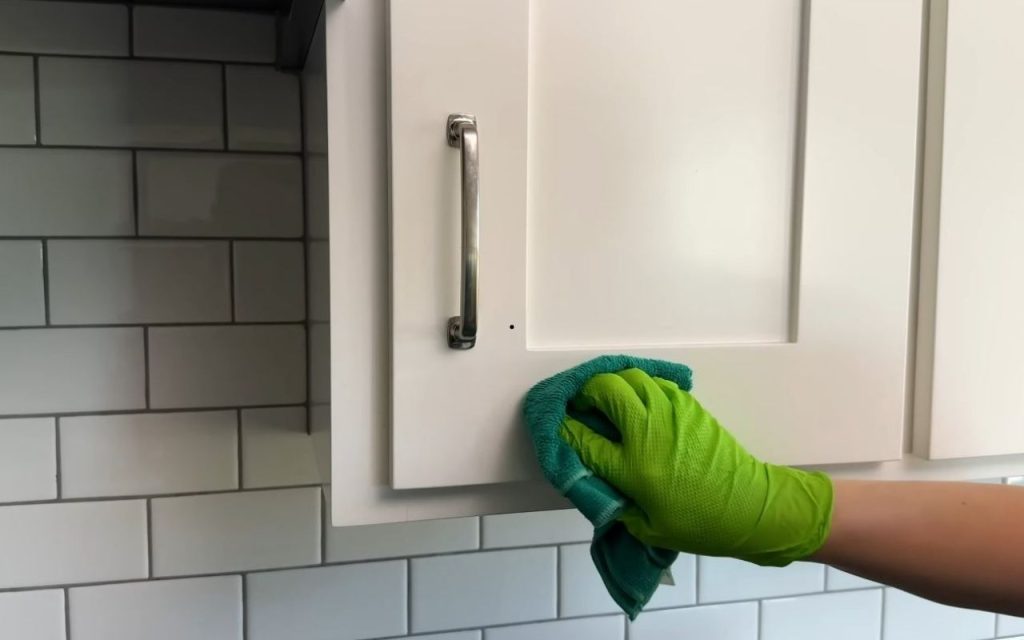
3. The Three-Towel Cleaning System
To ensure a streak-free finish, utilize a three-towel system. Work from the top of the cabinet down to the bottom.
- Clean: Dip the first towel into your cleaning solution and wipe the surface to remove grease and grime.
- Rinse: Dip the second towel in plain water only and wipe the cabinet to remove any soapy residue.
- Dry and Buff: Use the third, dry microfiber towel to dry the surface immediately. This step is crucial; leaving moisture behind can cause wood to warp and results in streaky drying.
4. Detail Scrubbing and Tough Spots
For areas with heavy buildup, such as cabinets near the stove, a simple wipe may not be enough.
- Scrubbing: Use a soft bristle brush or a non-scratch sponge softened under warm water to gently scrub greasy areas. You may need to clean these spots multiple times.
- Crevices: Use a toothbrush to remove grime from hardware, corners, and the ledges of cabinet designs where grease likes to stick.
- Stubborn Marks: For scuffs that do not wipe away, gently buff the area with a damp melamine sponge.
5. Cleaning Interiors and Drawers
Cleaning the inside of cabinets can be overwhelming, so it is best to clean one cabinet at a time.
- The Process: Empty the cabinet, clean the interior using the three-towel system, dry it thoroughly, and replace the items.
- Decluttering: As you reload the cabinet, check for items you no longer use and set them aside for donation.
- Drawers: To manage drawer contents, empty everything into a plastic bin. Clean and dry the drawer, then reorganize items as you put them back.
- Priority Areas: If you are short on time, focus on the cabinets used most often, such as spice drawers, dish cabinets, and those directly next to the stove.
Additional Tips and Warnings
- Handle Melamine Sponges with Care: Melamine sponges act like very fine sandpaper. Never scrub too hard, or you risk removing the paint or finish from your cabinets.
- Prevent Yellowing on White Cabinets: Grease buildup can cause white cabinets to yellow over time, damaging the paint. To prevent this, give the cabinets near your stove a quick wipe-down once a week.
- Address Spills Immediately: Clean up splatters, such as red tomato sauce, as soon as they happen to prevent permanent staining.
- Focus on High-Touch Points: Hardware and corners are high-touch areas that accumulate significantly more grease and grime, so give them extra attention.
- Recommended Frequency: Aside from the weekly maintenance of the stove area, a deep clean of all kitchen cabinets is recommended once or twice a year, typically during spring and fall cleaning.