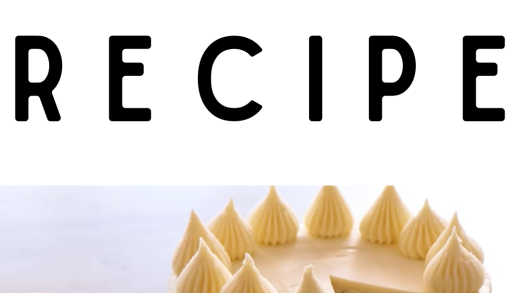
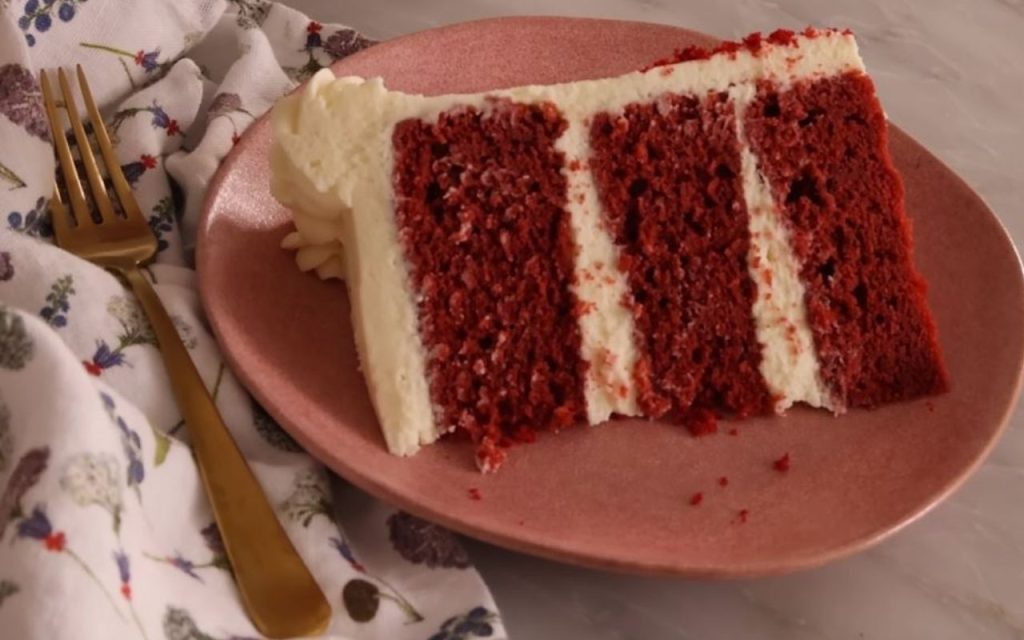
This Red Velvet Cake recipe delivers a luscious, melt-in-your-mouth texture paired with a tangy, creamy frosting. While the flavor of red velvet can sometimes be controversial, this version balances vanilla and chocolate notes for the lightest of chocolate flavors.
Historically, “velvet cake” from the Victorian era obtained a delicate pink hue from the reaction between cocoa powder and acid, but modern versions often rely on food coloring to achieve a crimson look. This recipe uses natural cocoa powder and buttermilk to ensure the classic tender crumb and signature taste.
Ingredients
The Red Velvet Cake
- 2 ½ cups (300g) All-purpose flour: If using measuring cups, fluff the flour and sprinkle it into the cup rather than scooping to avoid a dense cake.
- 1 tsp Baking soda: This provides lift and reacts with the acids in the batter.
- 1 tsp Salt: Use a teaspoon for kosher salt, or reduce to ¾ or ½ teaspoon if using fine table salt.
- ½ cup (113g) Unsalted butter, softened: The butter should be soft enough to cream easily.
- 1 ½ cups (300g) Granulated sugar.
- 2 Large eggs: Room temperature.
- 2 tsp Vanilla extract.
- 2 tbsp Natural cocoa powder: Natural cocoa is preferred over Dutch-processed because its acidity reacts better with the baking soda and buttermilk.
- Buttermilk: Essential for the cake’s texture and acidity.
- 1 tbsp White vinegar: Added to the buttermilk for extra acidity.
- Red food coloring: Gel food coloring is recommended as it is concentrated; the amount depends on the desired shade.
The Cream Cheese Frosting
- 1 ½ cups (340g) Unsalted butter, softened: Ensure it is very soft for smooth mixing.
- 16 oz (2 blocks) Cream cheese, softened.
- 5 ½ cups (1.5 lbs) Powdered sugar: Sift the sugar to prevent lumps in your piping tips.
- 1 tsp Vanilla extract.
- Pinch of Salt.
Instructions
1. Prepare the Oven and Pans
Preheat your oven to 350°F (175°C) so it is nice and hot when the batter is ready. Prepare three 6-inch pans or two 8- or 9-inch cake pans by using baking spray or butter and flour. For best results, place a round of parchment paper in the center of each pan.
2. Combine Dry Ingredients
In a medium bowl, whisk together the flour, baking soda, and salt. Whisking ensures the ingredients are nicely distributed and helps break up any lumps in the flour. Set this mixture aside.
3. Cream the Butter and Sugar
In the bowl of a stand mixer fitted with a paddle attachment, give the softened butter a quick mix for about 30 seconds to ensure there are no hard clumps. Add the granulated sugar and mix on medium speed for about 3 minutes until the mixture is light and fluffy.
4. Incorporate Eggs and Flavorings
Add the eggs one at a time, mixing on medium speed and allowing the first egg to incorporate before adding the next. Scrape down the bowl, then add the vanilla extract. Increase the speed to high for a few seconds to create a fluffy mixture.
5. Add Cocoa Powder
Sift the natural cocoa powder into the batter to remove any lumps. Mix until combined; the batter will take on a light chocolate color.
6. Prepare the Liquid Mixture
In a separate container with the buttermilk, add the white vinegar and the red gel food coloring. Whisk these together until the dye is fully incorporated and the liquid reaches your desired color intensity.
7. Combine Wet and Dry Ingredients
Reduce the mixer speed to the lowest setting. Add half of the flour mixture, followed by half of the buttermilk mixture, then the remaining flour and the remaining buttermilk. Do not overmix, or the cake may become gummy and dense. Stop the mixer when the ingredients are just combined and finish folding by hand with a spatula to ensure no streaks of flour remain.
8. Bake
Distribute the batter evenly among the prepared pans. If you want to create crumbs for decoration, you can reserve a few tablespoons of batter to bake separately as a small cupcake. Bake 6-inch layers for 30 to 35 minutes, or 8 to 9-inch layers for 25 to 30 minutes, checking the center for doneness. Allow the cakes to cool completely before frosting.
9. Make the Cream Cheese Frosting
In a stand mixer, cream the softened butter and cream cheese together on medium speed for about 3 minutes until smooth and fluffy. Add the pinch of salt and vanilla extract. Lower the speed and gradually add the sifted powdered sugar. Once mixed, increase to medium speed for a minute to fluff up the frosting.
10. Assemble and Decorate
Spread frosting between the cake layers and over the top and sides. For a professional finish, you can use a bench scraper to smooth the sides. If you reserved batter to make a “mini cupcake,” grate it using a cheese grater to create fluffy red crumbs. Gently press these crumbs along the bottom edge of the cake to create a decorative skirt.
Optional Tips
- Vegetable Oil Substitution: For a cake that stays softer when chilled, you can substitute the butter in the cake batter with an equal amount of vegetable oil.
- Cake Strips: To achieve flat cake layers without doming, wrap damp fabric cake strips around the outside of your pans before baking.
- Frosting Stability: Cream cheese frosting is soft; if the cake feels unstable during assembly, insert a skewer through the center and chill it in the fridge to firm up.
- Ermine Frosting: For a more traditional, less sweet option, you can use ermine frosting (flour-based frosting) instead of cream cheese frosting.