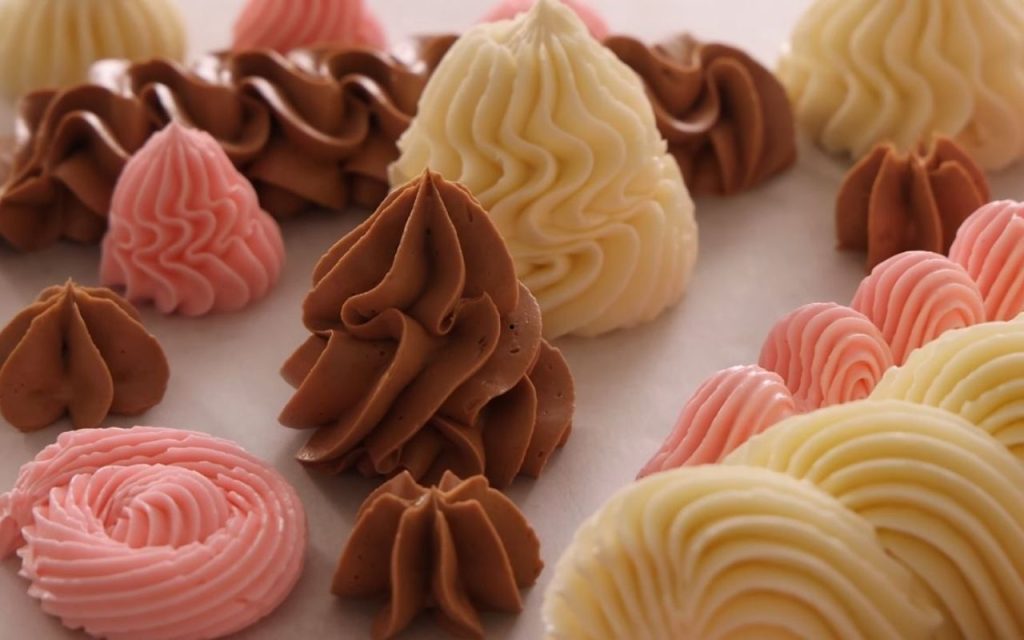
If you find traditional American buttercream too gritty or overpowering, this Swiss Meringue Buttercream is the perfect alternative. Renowned for its silky texture and balanced sweetness, this frosting holds its shape beautifully for piping and offers a sophisticated finish for cakes and cupcakes.
While the method is different from standard buttercream, it is safer and easier than the Italian meringue method because the eggs are gently cooked over simmering water rather than requiring hot sugar syrup. With a few simple steps, you can achieve a stable, marshmallowy frosting that serves as the perfect canvas for vanilla, chocolate, or fruit flavors.
Ingredients
- 5 Egg Whites: Approximately 2/3 cup. If using frozen egg whites, ensure they are fully defrosted.
- 1 ½ cups (300g) Granulated Sugar.
- Pinch of Salt: Adds necessary contrast to the sweetness.
- 2 cups (452g) Unsalted Butter: Must be softened to room temperature. You can use standard butter or solidified brown butter for a nuttier flavor.
- 1 tsp Vanilla Extract: Can be substituted with almond, fruit, or other extracts.
Instructions
- Prepare the Double Boiler Fill a medium pot with one to two inches of water and place it over medium heat to bring it to a simmer. Select a heat-proof bowl that can sit on top of the pot without touching the water.
- Combine Egg Whites and Sugar In your heat-proof bowl, combine the egg whites, granulated sugar, and a pinch of salt. Whisk them together. Ensure your bowl and tools are completely clean and free of grease; you can wipe the bowl with a little lemon juice or vinegar beforehand to ensure no oil prevents the meringue from forming.
- Heat the Mixture Place the bowl over the simmering water. Stir the mixture occasionally (it does not need to be constant at first) to heat the eggs gently. As the mixture warms, stir more frequently. You are looking to reach a temperature of 160°F (71°C) to ensure food safety.
- The Finger Test: If you do not have a thermometer, dip a clean finger into the mixture. It should feel hot to the touch, and the sugar should be completely dissolved with no sandy grains remaining.
- Whip the Meringue Once the sugar is dissolved and the eggs are safe, carefully remove the bowl from the heat. Using a stand mixer fitted with the whisk attachment, whip the mixture, starting on low and increasing to medium-high. Whip until the meringue creates sharp, strong, marshmallowy spires and the bowl feels cool to the touch (around the mid-70s°F).
- Note: This process can take around 10 minutes. If the bowl is still warm, the butter will melt when added. You can pack frozen peas or ice packs around the base of the bowl to speed up the cooling process.
- Add the Butter Once the meringue is cool and stiff, switch to the paddle attachment (a whisk works in a pinch). With the mixer on low speed, add the room-temperature butter one tablespoon at a time. Let each piece mix for a few seconds before adding the next.
- The “Panic” Phase (Keep Mixing!) As you add the butter, the mixture may deflate and look soupy or curdled. Do not panic. This is normal. Continue mixing, and the frosting will eventually come together into a smooth, structured cream.
- Troubleshooting: If it remains soupy after all the butter is added, refrigerate the bowl for 5 to 10 minutes, then whip again. If it looks curdled or “cottage cheesy” (too cold), microwave a small amount of the mixture for 10-20 seconds or use a hair dryer on the outside of the bowl to warm it slightly, then whip until smooth.
- Flavor and Finish Once the texture is silky and stable, add the vanilla extract (or your preferred flavoring). Switch the mixer to high speed for about 30 seconds to ensure the buttercream is perfectly smooth and free of air bubbles.
Expert Tips & Variations
- Chocolate Swiss Meringue: To make chocolate buttercream, melt about 3/4 cup of chocolate and let it cool (so it isn’t hot). Pour it into the finished buttercream and mix until the streaks disappear. The chocolate provides extra stability as it cools.
- How to Color the Frosting: Because of the high butter content, adding gel coloring directly can result in dull colors. For vivid colors, take a tablespoon of finished buttercream, mix it with a drop of gel food coloring in a small bowl, and microwave it for roughly 30 seconds until melted. Mix this bright liquid back into the main batch of frosting for a saturated, even color.
- Make Ahead: This frosting can be stored in a sealed container in the fridge for up to a week or frozen for a month. Before using, bring it back to room temperature and re-whip firmly for 30 seconds to restore its creamy texture.
- Brown Butter Upgrade: For an autumnal, nutty flavor, brown your butter the night before and let it solidify back to room temperature before using it in step 5.