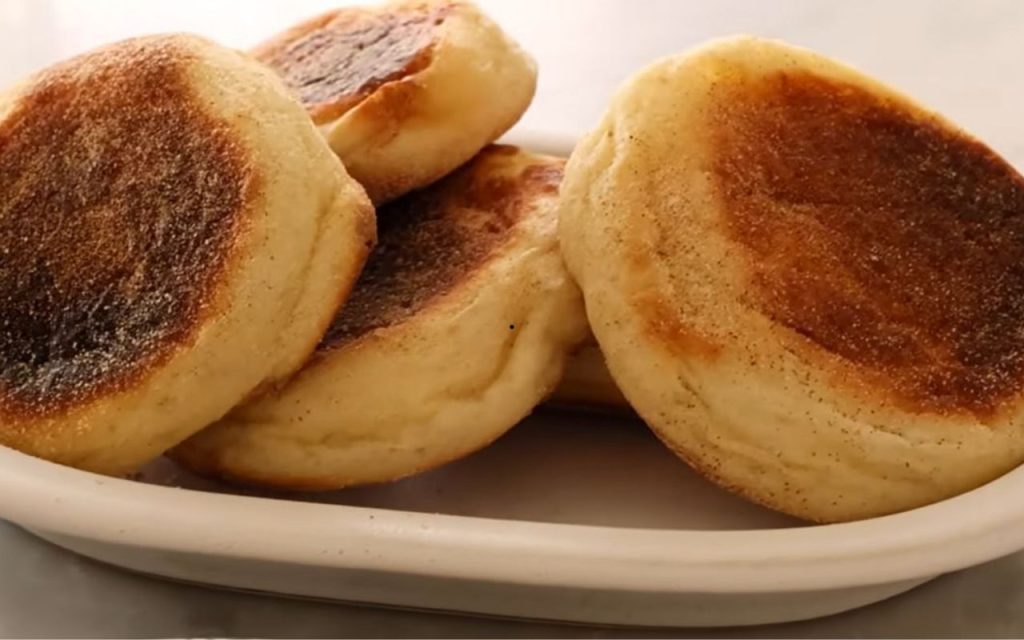
There is a world of difference between a store-bought English muffin and one made from scratch. While the packaged variety can often taste stale—resembling week-old bread—homemade English muffins are incredibly spongy, delicate, and cloud-like.
Interestingly, while they are known as “English” muffins, they are actually an American creation developed by a British immigrant named Samuel Thomas. They were originally called “toaster crumpets,” a charming name that perfectly describes their purpose. This recipe produces a high-hydration dough that results in the famous “nooks and crannies” essential for holding lashings of butter and jam,.
This method utilizes a stovetop griddle rather than an oven, steaming the dough inside a covered pan to achieve the perfect texture.
Ingredients
The Yeast Mixture
- 3/4 cup Whole milk
- 1/2 cup Water
- 2 tbsp Granulated sugar
- 1 envelope (or 2 1/4 tsp) Active dry yeast (not instant),
The Dough
- 3 cups (360g) All-purpose flour
- 1 tsp Salt
- 3 tbsp Unsalted butter, melted (warm, not scalding),
- 1 Egg, room temperature
For Shaping and Cooking
- Oil (for greasing the bowl)
- Cornmeal or Semolina (for dusting)
Instructions
1. Activate the Yeast
Begin by combining the whole milk and water in a small bowl or measuring cup. Warm the mixture in the microwave (using 30-second bursts) until it reaches 110°F. It should feel very warm to the touch, but not hot. Stir in the granulated sugar and the active dry yeast. Set this mixture aside for 5 to 7 minutes until a beautiful foamy head forms. If the mixture does not foam, the yeast is inactive, and you must start over.
2. Prepare the Dry Ingredients
While the yeast is blooming, whisk together the all-purpose flour and salt in the bowl of a stand mixer.
3. Mix the Dough
Once the yeast mixture is foamy, pour it into the flour mixture. Add the melted butter and the egg. Using a stand mixer fitted with a paddle attachment, mix on low speed to combine. Initially, the dough will look wet, lumpy, and lack structure—this is normal.
4. Knead for Structure
Increase the mixer speed to medium-high and beat the dough for approximately 7 minutes. This extended mixing time is crucial for developing gluten. By the end, the dough should be smooth and elastic, though it will still be sticky to the touch.
5. The First Rise
Transfer the dough to a clean, oiled bowl. You can use your hand to work a little oil around the bowl to prevent sticking. Cover the bowl and let it rise in a cozy, warm spot for about one hour, or until it has doubled in size.
- Make-ahead option: You can place the dough in the fridge overnight. If doing so, let the dough warm on the counter for an hour the next day before shaping.
6. Shape the Muffins
Prepare two rimmed baking sheets by lining them with parchment paper and dusting them generously with cornmeal or semolina to prevent sticking.
Once the dough has risen, lightly flour a work surface and your hands. Gently transfer the dough to the surface and pat it out to just under 1-inch thickness. Use a floured 2 1/2-inch round cutter to cut out your muffins. Use a bench scraper to help transfer the rounds to the prepared baking sheets, as the high-hydration dough is delicate.
Gather any scraps, gently reform them, and cut out remaining muffins. Be careful not to overwork the scraps; if they tighten up, let them rest briefly before cutting.
7. The Second Rise
Dust the tops of the muffins with a little more cornmeal. Cover them loosely and place them in a warm spot for about 30 minutes. They should puff up significantly,.
8. Cook on the Stovetop
Heat a large skillet or griddle over the lowest possible heat. This is the secret to ensuring the muffins cook through without burning.
- Note on pans: A steel or copper pan is preferred over cast iron for this recipe, as cast iron can accumulate too much heat over multiple batches.
Once the pan is warm, sprinkle a little cornmeal on the surface. Working in batches (3 to 4 at a time), place the muffins in the pan. Cover the pan with a lid,.
Cook for 6 to 8 minutes on the first side. The closed lid creates a steam-cooking environment that helps the dough rise further. Check at the 6-minute mark; if they are lightly golden, flip them over. Cover again and cook for another 5 to 6 minutes.
9. Cool and Serve
Transfer the cooked muffins to a cooling rack. Before starting the next batch, carefully wipe the skillet clean to remove old cornmeal, which can burn and taste bitter,. Repeat with the remaining dough.
Chef’s Tips
- Proper Splitting: To preserve the signature interior texture, never slice an English muffin with a knife. Instead, use a fork to pierce all around the middle and pull it apart. This reveals the “nooks and crannies”.
- Heat Management: If your muffins are browning too quickly, reduce the heat or the cooking time slightly. The first batch often serves as a test run to adjust your burner,.
- Storage: These muffins stay fresh for 3 to 5 days at room temperature. For longer storage, freeze them for up to 3 months. When ready to eat, simply toast them from fresh or frozen.
- Uniformity: For a perfectly round, “factory-style” look, you can cook the muffins inside metal rings on the griddle. However, cooking them free-form gives them a charming, organic appearance.