You should clean and oil your sewing machine based on how often you use it and the kind of fabric you sew with. If you frequently use fabrics that shed fibers, like velvet, you’ll need to clean it more often. If you don’t sew much, cleaning it every few months is enough. If your machine starts squeaking or you notice dirt build-up, it’s time to clean it.
STEP 1
First, unplug your sewing machine. To start cleaning, take off the throat plate, where dust and fabric fibers usually collect. Check your sewing machine’s manual for instructions on how to remove the throat plate. Some machines have a screwdriver for unscrewing the plate, while others have plates that just slide off.
STEP 2
Use a nylon brush to gather all the dust and reach into all the small spaces. Avoid using compressed air inside your machine, as it can push debris deeper. If your machine has a bobbin case, remove it and clean it well. Also, clean around and between the feed dogs. You can use the end of a screwdriver to push out dust or just use the nylon brush to sweep it away.
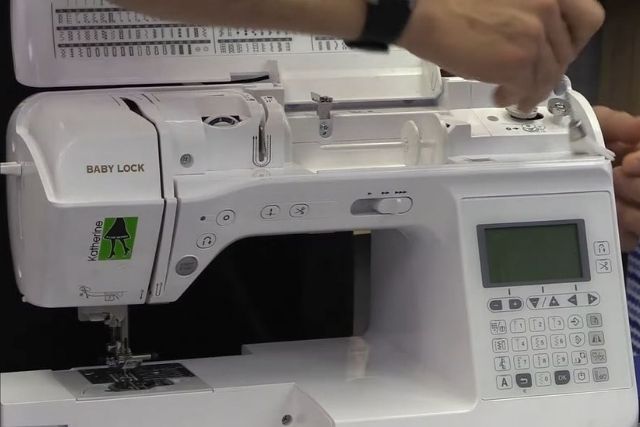
STEP 3
After cleaning the lower part of the machine, it’s time to oil it. Sewing machine oil is a special lubricant designed to keep the parts running smoothly and prevent wear and tear. To apply the oil, turn the hand wheel back and forth with one hand to identify where the moving parts touch and create friction—these are the areas you need to oil. Apply just a small amount of sewing machine oil to these moving parts, ensuring it’s specifically sewing oil. Your machine might come with a small oil container. After oiling, turn the wheel a few times to distribute the oil evenly.
STEP 4
Use a piece of fabric, like muslin, to soak up any excess oil on your machine’s body to prevent oil stains on your next project. After that, reattach the throat plate, and your sewing machine will be ready for use. You might also want to wipe down the entire machine with a dust cloth, especially along the thread path, to ensure it’s completely clean.
Plug your machine back in and use a scrap piece of fabric to sew a few test seams. This will ensure everything is working smoothly before you start your next project.
Here’s a final tip: To prevent dust and debris from building up in your sewing machine, cover it when not in use. Your machine might come with a cover, but you can also make one yourself to keep it clean.