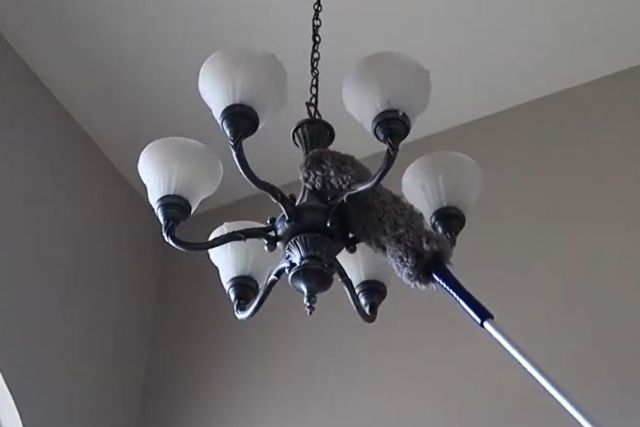
Light fixtures that are hard to reach rarely get cleaned because of how difficult they are to access. However, cleaning experts say there’s one tool that can make the task infinitely easier: an extendable duster. It has an adjustable handle and a dust-trapping head that allows you to reach tall light fixtures. If the light in question is still hard to reach, grab a step stool or a tall ladder that’s stable and sturdy.
Whether you need to clean a dining room chandelier, kitchen pendant lights, or a hallway flush mount, read the below expert-recommended tips for safely cleaning light fixtures that are hard to reach.
How to Clean a Lighting Fixture You Can’t Reach
- Turn the power off. Before you start cleaning a light fixture, make sure the power has been turned off and the light has cooled completely.
Cover the floor. Place a tarp or large drop cloth underneath the light fixture to protect the flooring and catch any dust.
Check your ladder. If you are using a ladder or a step stool, check that it is stable and can securely hold you.
Use an extendable duster. “Extend the handle to its full length and gently glide to wipe dust,” says Rhonda Wilson, quality lead cleaner at FreshSpace Cleaning.
Dampen the duster. If needed, dampen the duster with water or glass cleaner once you have removed loose dust.
Swap out the duster. “Swap out the duster for a dry one and give it a final wipe so there’s no moisture left,” Wilson says.
Warning
Make sure you stay safe when cleaning light fixtures that are high up and use a sturdy ladder or step stool. If you don’t have a ladder tall enough or don’t feel comfortable trying to reach tall heights, stay on the safe side and call in a professional.
How to Clean a Chandelier
- Turn the power off. Before you begin, make sure the power has been turned off and all parts of the chandelier have cooled completely.
Check your ladder. If you are using a ladder or a step stool to reach the chandelier, check that it is stable and will securely hold you.
Dampen a microfiber cloth. Kaylie Hill, Scotch-Brite ambassador and cleaning influencer, recommends carefully wiping down each piece of the chandelier with a dampened microfiber cloth first.
Work in sections. “Cleaning section by section helps the process feel more manageable and ensures nothing is missed,” Hill says.
Use a glass cleaner. Once every piece has been wiped down, Hill recommends going back with a glass cleaner. Instead of spraying it directly onto the chandelier, the cleaning pro recommends spraying it on a new, dry microfiber cloth and using that to carefully clean each piece.
Tips for Cleaning a Lighting Fixture You Can’t Reach
Remove Pendant Light Shades
Each type of light fixture has its challenges, but according to Hill, the key is using the right cleaning tools.
“For pendants, I suggest removing the shade if possible and wiping it down with a zero-scratch sponge to lift grease and fingerprints,” Hill says.
She explains that you can often disassemble glass or stainless steel pendant lights and wash them in the sink with soap and water when a deeper clean is needed.
Utilize a Telescoping Pole
A Swiffer duster with an extendable handle is Wilson’s go-to cleaning tool for out-of-reach light fixtures.
“If it’s still short and you don’t want to drag out a ladder or stand on a chair, clip it onto a telescopic pole,” Wilson says.
Dry and Wet Clean Flush Mounts
To clean flush mount-style light fixtures on the ceiling, Hill recommends dusting them with a microfiber cloth first, then wiping them with a sponge to remove any sticky debris.
Use a Broom and a Microfiber Cloth
If an extendable duster is not available, Hill suggests a DIY alternative.
“Try attaching a microfiber cloth to the end of a broomstick to reach the fixture,” Hill says.
The cleaning expert says it’s best to use a step stool or tall ladder to get closer to the light fixture, or call a professional company that provides this service if necessary.