This classic dessert is the centerpiece of any fall gathering, but many people mistakenly believe a perfect pumpkin pie is difficult to achieve. Say goodbye to cracked tops and soggy bottoms! This recipe delivers a silky, warming pumpkin custard filling nestled inside a golden, crisp, buttery crust. While the spices and rich brown sugar provide the dominant flavor profile, the texture—smooth filling paired with a flaky crust—is what makes this pie truly unforgettable.
Whether you opt for a quick, store-bought shell or prepare your dough from scratch, follow these simple steps for a holiday-worthy treat that tastes incredible.
Ingredients
For the Filling (for a 9-inch pie)
- 3/4 cup light brown sugar (packed)
- 1/2 teaspoon ground cinnamon (use a rounded half teaspoon for extra flavor)
- 1/2 teaspoon ground ginger (use a rounded half teaspoon for extra flavor)
- 1/8 teaspoon ground cloves (a pinch)
- 1/4 teaspoon nutmeg (freshly grated or powdered)
- 1/2 teaspoon salt
- 1 (15 oz) can pumpkin puree
- 1 (12 oz) can evaporated milk (or use half and half as a substitute)
- 3 large eggs
- Optional: 1 to 2 teaspoons vanilla extract (if not adding vanilla to the whipped cream topping)
For the Crust (Use a store-bought crust or your favorite homemade recipe)
- 1 batch (approximately 14-inch circle) chilled pie dough for a 9-inch pie dish
Instructions
1. Prepare and Chill the Pie Crust
- If using homemade dough, lightly flour your surface, the top of the dough, and your rolling pin. Roll the dough out into a circle approximately 13 to 14 inches in diameter.
- Place the dough into a 9-inch pie dish. To prevent shrinking during baking, scooch the dough into the dish from the edge rather than pressing it in.
- Fix the edges if necessary, then fold the excess dough under and crimp the edges using your thumb against your index finger and thumb on the opposing hand.
- Once the crust is shaped, place it into the freezer to chill for at least 20 minutes while you prepare the filling.
2. Optional: Par-Bake the Crust for a Crisp Bottom
- Preheat your oven to 425°F.
- Grab parchment paper and press it into the chilled crust.
- Place a layer of heavy-duty aluminum foil (tripled up is recommended) on top of the paper and press it against the edges of the crust to provide support and prevent slumping.
- Fill the foil-lined crust with pie weights or dried beans.
- Bake at 425°F for 15 minutes.
- Carefully remove the weights, foil, and parchment paper.
- Optional: Brush the edges of the par-baked crust with a light egg wash to achieve a beautiful golden color.
- If using a store-bought crust, you will start the process here.
3. Mix the Pumpkin Filling
- Preheat your oven to 400°F (if you are now starting the baking process).
- In a large bowl, combine the brown sugar, cinnamon, ginger, cloves, nutmeg, and salt. Whisk briefly to mix the dry ingredients and help break up any lumps in the sugar. The spices and sugar form the essential flavor base.
- Add the 15 oz can of pumpkin puree and the 12 oz can of evaporated milk.
- Crack the three eggs into a small, separate bowl first to ensure no eggshells get into the mixture, then add them to the bowl.
- Whisk the filling gently until everything is smooth and well combined. Important: Do not use a food processor or a blender, as aggressive mixing introduces bubbles that will expand in the oven, resulting in a cracked, dry, and less creamy texture.
4. Bake the Pie
- Carefully pour the filling into the prepared pie crust. If the pie is very full, place it on a rimmed baking sheet for easier transport.
- Place the pie in the 400°F oven for 15 minutes.
- After 15 minutes, reduce the oven temperature to 350°F.
- Continue baking until the edge of the filling is set and the center slightly jiggles when moved (this will take about 40 minutes). The residual heat after removal will finish setting the custard.
- If the pie crust begins to take on too much color when you reduce the heat, tent the edges loosely with aluminum foil for protection.
- Remove the pie from the oven and allow it to cool completely before slicing.
5. Serving and Storage
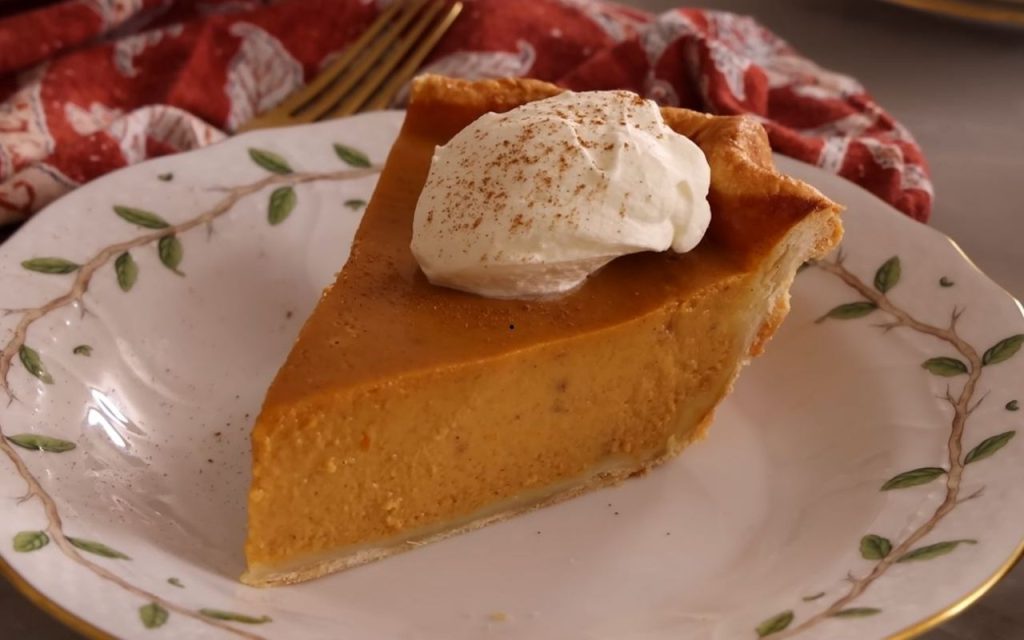
- Serve with a large dollop of whipped cream and a sprinkle of cinnamon.
- Store leftover pie loosely covered in the refrigerator for up to 2 days.
- The baked pie can also be frozen for up to a month; ensure you thaw it overnight before enjoying.
Optional Tips for Pie Perfection
- Handling Cold Dough: If your homemade pie dough is cracking badly during rolling, allow it to rest on the countertop for a few minutes; it is likely too cold.
- Preventing Shrinkage: When fitting the dough into the pie dish, avoid stretching the dough. Instead, scooch it into place from the edge of the dish.
- Crust Flavor Boost: You can customize your homemade crust by adding fall spices, such as a pinch of nutmeg or a half teaspoon of cinnamon, to the dough. You could also substitute brown butter for regular cold butter in the crust.
- Homemade Puree Consideration: If you are using homemade pumpkin puree (made from sugar pie pumpkins), note that it may contain less moisture than canned puree, so you might need to add a little extra liquid to the filling.
- Reusing Supports: The aluminum foil, dried beans, or pie weights used for par-baking can be reused multiple times.