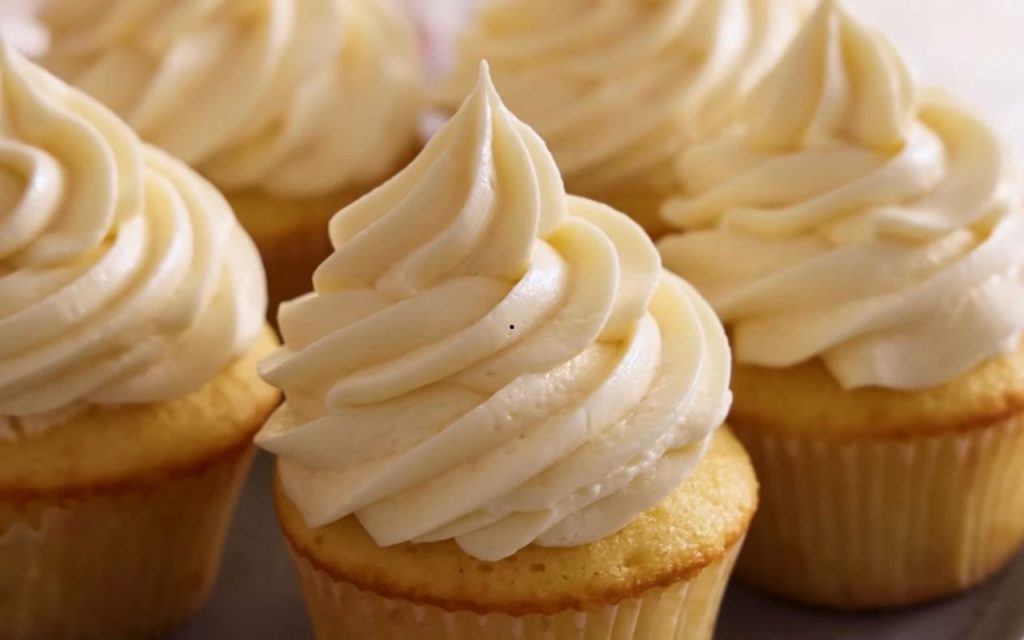
If you find standard American buttercream too sweet or gritty, but find Swiss meringue buttercream too intimidating to make, Ermine frosting is the perfect solution. Also known as “boiled milk frosting” or “cooked flour frosting,” this vintage recipe dates back to the 1800s and was the original topping for Red Velvet cake.
This frosting gained immense popularity during the Great Depression because it utilizes affordable pantry staples rather than large quantities of confectioners’ sugar. The result is a dessert topping with a texture as smooth as the regal ermine fur it was named after. It offers the sophisticated, silky mouthfeel of a meringue-based buttercream but is significantly easier to prepare. It is light, creamy, and not overly sweet, making it an ideal choice for cakes, cupcakes, and whoopie pies.
Ingredients
- 2 cups (400g) Granulated sugar
- 2/3 cup (80g) All-purpose flour
- 2 cups Whole milk
- 2 cups (1 lb / 450g) Unsalted butter, softened to room temperature
- 1/2 tsp Salt
- 2 tsp Vanilla extract
Instructions
- Combine Dry Ingredients: In a saucepan, whisk together the granulated sugar and all-purpose flour. It is essential to whisk these ingredients thoroughly before adding liquid to prevent clumps from forming later.
- Add Milk and Cook: Whisk in the whole milk until combined. Place the pan over medium-high heat and bring the mixture to a simmer. You must whisk constantly to prevent the mixture from scalding or becoming chunky.
- Thicken the Base: Once the mixture begins to simmer, reduce the heat to medium-low. Continue whisking for another 1 to 2 minutes until the mixture thickens into a pudding-like consistency.
- Cool the Mixture: Remove the pan from the heat. Transfer the cooked flour paste (which is essentially an unflavored milk pudding) into a heat-proof glass bowl.
- Cover and Rest: Press a piece of parchment paper directly onto the surface of the pudding mixture. This step is crucial to prevent a skin from forming as it cools. Allow the mixture to cool completely to room temperature. This will take approximately 3 hours, though it can be made a day in advance and refrigerated (if refrigerated, let it come back to room temperature before use).
- Cream the Butter: Place the room-temperature butter and salt into the bowl of a stand mixer fitted with a paddle attachment. Beat on medium speed for about 2 minutes until the butter is smooth, creamy, and free of lumps.
- Incorporate the Base: With the mixer on medium-low speed, add the cooled pudding mixture to the butter one spoonful (2 to 3 tablespoons) at a time. Allow each addition to incorporate fully before adding the next. Stop occasionally to scrape down the bowl to ensure a homogeneous mixture.
- Whip to Finish: Once all the pudding base has been added, pour in the vanilla extract. Increase the mixer speed to medium and beat for 1 minute. The texture will transform into a fluffy, cloud-like consistency similar to Swiss or Italian buttercream.
Tips for Success
- Proper Whisking: When cooking the base, using a narrow whisk is recommended as it helps reach into the corners of the pan to prevent burning.
- Temperature Matters: Ensure both your butter and the cooked pudding base are at room temperature before combining them. If the pudding base is too cold, the frosting will not emulsify correctly.
- Storage: This frosting can be stored in an airtight container in the refrigerator for up to a week. Before using it, let it come to room temperature and beat it again to restore its texture.
- Freezing: You can freeze this frosting for up to 3 months. Press plastic wrap against the surface before covering to prevent a film from developing. Thaw, bring to room temperature, and re-whip before use.