These classic butter cookies are the perfect balance of texture and flavor: crisp on the edges, melt-in-your-mouth soft on the inside, and rich without being overly sweet. Reminiscent of the famous Danish cookies often found in tins during the holidays, this recipe relies on simple, high-quality ingredients and proper technique rather than chemical leaveners to achieve its delightful lift.
Whether you are baking for the holidays or simply craving a buttery treat to go with your coffee, these slice-and-bake cookies are effortless to prepare and store beautifully.
Ingredients
- Unsalted Butter: 1 cup (226g), room temperature and soft.
- Granulated Sugar: ½ cup (100g).
- Salt: ½ teaspoon.
- Egg Yolks: 2 large yolks (save the whites for another use like meringue or omelets).
- Vanilla Extract: 2 teaspoons.
- All-Purpose Flour: 2 cups (240g).
- Sanding Sugar or Granulated Sugar: For rolling and coating the dough.
Instructions
- Cream the Butter and Sugar Place the softened butter, granulated sugar, and salt into the bowl of a stand mixer. Beat on medium speed for approximately 3 minutes until the mixture is pale, nice, and fluffy. This step is crucial as the recipe uses no baking powder or soda; the air incorporated here provides the cookie’s structure.
- Add Wet Ingredients Add the two egg yolks and the vanilla extract to the butter mixture. Mix until combined, resulting in a rich, golden interior. Be sure to scrape down the sides of the bowl to ensure everything is evenly incorporated.
- Add the Flour Add the flour to the wet ingredients. Mix on low speed until the dough is just combined or almost combined. Do not overmix, as this can lead to a tough cookie. Use a spatula to scrape the bowl and finish mixing by hand to incorporate any crumbly pockets of butter and flour.
- Shape the Log Transfer the dough, which will be soft and slightly sticky, onto a piece of plastic wrap or parchment paper. Lightly flour your hands if necessary and shape the dough into a rough log. Wrap the dough completely in the plastic and roll it on the counter to smooth it out.
- Chill the Dough To prevent the bottom of the log from flattening in the fridge, cut an empty paper towel roll down the middle and place the wrapped dough log inside it. Refrigerate for at least 1 hour. This chills the butter, ensuring the cookies don’t turn into a puddle when baked.
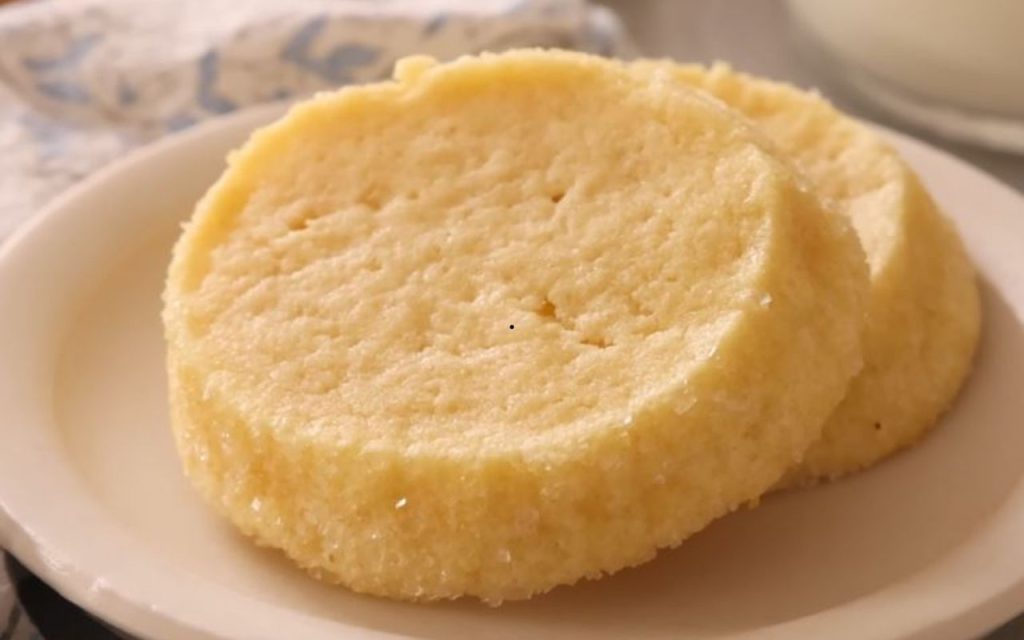
- Coat and Slice Preheat your oven to 350°F (175°C). Remove the dough from the fridge. If it has become slightly oval-shaped, give it a quick roll on the counter to round it out again. Unrwap the log and roll it in sanding sugar (or granulated sugar) until the exterior is completely coated. Slice the log into “coins” approximately ⅓ of an inch thick.
- Bake Place the cookies on a baking sheet spaced about 1 ½ to 2 inches apart. Bake for 10 to 12 minutes, or until they are just starting to take on a golden color.
- Cool and Serve Allow the cookies to cool. They should be crispy on the outside and soft on the inside.
Baker’s Tips for Success
- Measuring Flour Correctly: Do not scoop the flour directly with the measuring cup, as this packs it down and can result in a dry, dense cookie. Instead, fluff the flour in its container, sprinkle it into the measuring cup until full, and level it off. Ideally, use a kitchen scale to measure exactly 240g.
- Cardboard Tube Hack: Because the dough is very soft before chilling, it tends to flatten on the bottom shelf of the fridge. Resting the wrapped dough inside a split cardboard paper towel tube helps maintain a perfect round shape.
- Make-Ahead Storage: You can prepare the dough log 1 to 2 days in advance and keep it in the fridge. Alternatively, the dough can be frozen for up to 2 months if well-wrapped.
- Custom Colors: If you cannot find colored sanding sugar, you can make your own by mixing granulated sugar with a drop of food coloring in a plastic bag and mashing it until the color is uniform.
- Finished Storage: Baked cookies will last 3 to 5 days at room temperature, 2 weeks in the refrigerator, or up to 2 months in the freezer.