Window tracks often accumulate significant dirt, debris, and sometimes mold or mildew due to exposure to the elements. Maintaining clean tracks is crucial, as attempting to clean wet, dry debris will turn it into mud, causing the grime to work itself into hard-to-reach cracks and crevices, making the job much harder. Regular cleaning, ideally once or twice a year (such as during spring cleaning and again in the fall), ensures the task remains manageable.
Supplies Needed
- Small, simple paintbrush or toothbrush
- Vacuum cleaner with brush or hose attachment (a shop vacuum is also suitable)
- Spray bottle for cleaner application
- Soft-bristle scrubbing brush (must be stiff yet flexible enough to reach corners)
- Damp cloth
- Your chosen cleaning solution:
- DIY Vinegar Mix: 1 cup distilled white vinegar, 1 cup water, and approximately 1 teaspoon of liquid dish soap.
- Alternative: A basic multi-purpose cleaner or a cleaner containing bleach, ensuring the product is formulated to cut through mold and mildew buildup.
Step-by-Step Instructions
1. Prepare the Area: It is highly recommended to perform this task on a day when the tracks are completely dry. If it has recently rained, or if the tracks are damp or dewy, wait for dry conditions, as moisture will significantly increase the difficulty of cleaning.
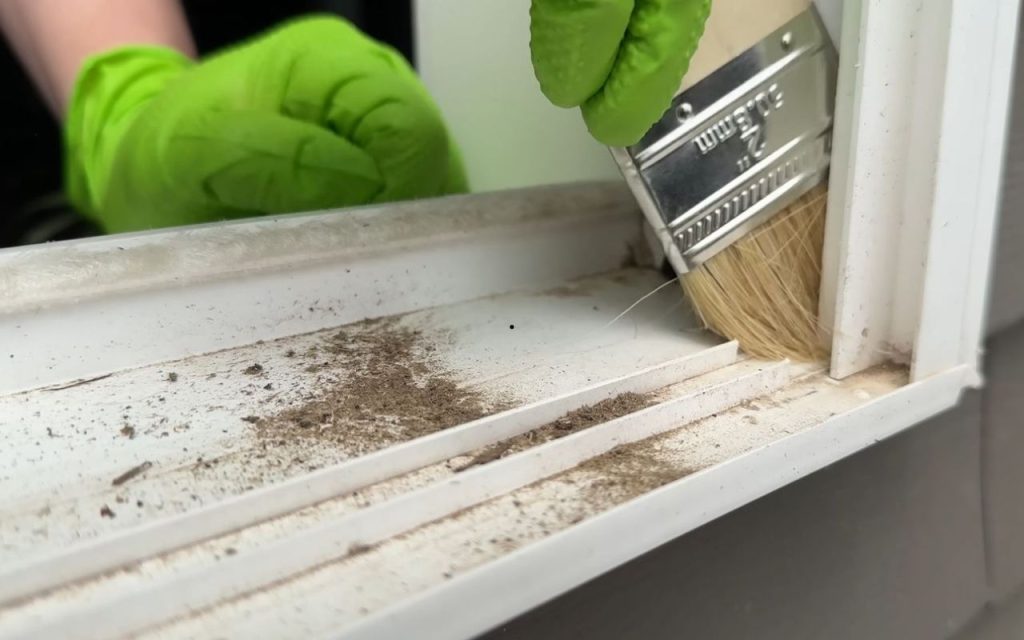
2. Sweep Away Dry Debris: Before applying any liquid cleaner, use a simple paintbrush or a toothbrush to sweep out the loose, dry dirt and debris. Focus especially on pushing material out of the cracks and crevices where it tends to collect.
3. Vacuum the Loose Material: Once the dry debris has been swept into the center of the track, use a vacuum attachment (such as a brush attachment or a shop vacuum) to remove and suck up all the material.
4. Apply the Cleaner: Spray your chosen cleaner (either the DIY vinegar solution or a commercial cleaner) onto the tracks. If you are using the DIY mix, note that distilled white vinegar is generally sufficient; stronger cleaning vinegar is typically unnecessary unless the tracks are exceptionally filthy.
5. Allow the Cleaner to Dwell: Allow the cleaner to sit and work, especially if mold or mildew is present, as this is essential for effective removal.
6. Scrub the Tracks Thoroughly: Use a soft-bristle brush to scrub the tracks. A brush is preferred over a sponge because the bristles are able to get into all the necessary cracks and corners. Select a brush that is stiff enough to clean effectively but flexible enough to maneuver around all the track areas.
7. Use the Flooding Technique for Deep Corners (If Needed): If dirt remains lodged deep in the corners or small drain slots, use the DIY vinegar mix or cleaner to “flood” the area. This helps work the deeply embedded dirt loose, making it easier to remove the grime that a standard scrubber cannot reach. The liquid will drain out easily.
8. Wipe and Rinse the Tracks: Use a damp cloth to wipe down all surfaces. This step serves two purposes: to rinse off residual cleaner so it does not dry sticky, and to ensure all remaining dirt is removed from the tracks.
9. Clean the Bottom Edge of the Window: A key professional tip is to ensure you clean the bottom of the window itself—specifically the rubber seal or bottom edge that sits in the track. If this part of the window remains dirty, closing and reopening the window will leave a large dirty line on your newly cleaned track. Spray the bottom edge down and give it a quick wipe before closing the window.
Additional Tips or Warnings
- Timing is Key: Always wait for a dry day to clean your tracks. Attempting to clean when the tracks are damp or wet will make the job significantly harder.
- Frequency: Cleaning your window tracks once or twice per year helps prevent extreme buildup, ensuring that future cleaning tasks require much less effort.
- Optimal Scrubbing Tool: When choosing a brush, look for one that has thick bristles and provides a good balance between stiffness and flexibility to effectively navigate the complex contours of the window track.